
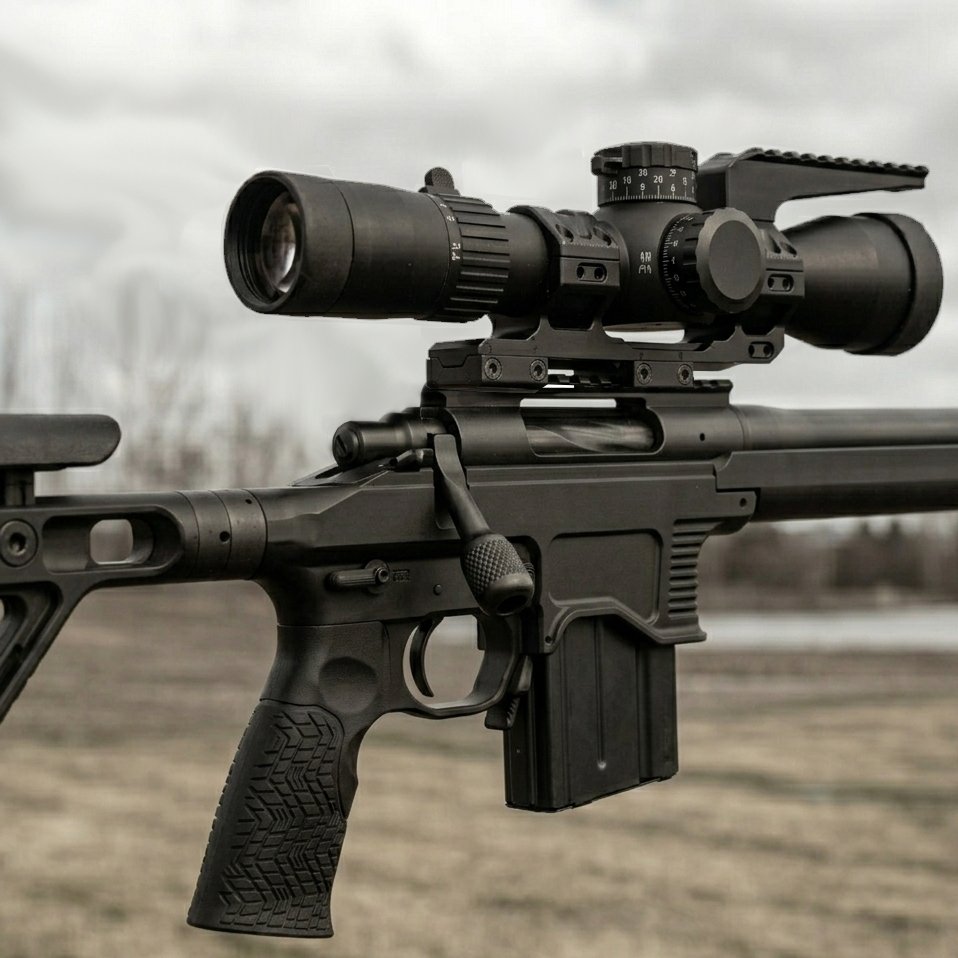
The Job of a 1-Piece Scope Mount
A 1-piece scope mount does one thing that matters above all else: it holds your optic in alignment with your bore through thousands of rounds of recoil. Everything else is secondary to that core job, including height, cant, weight, and accessory rails. The mount is the structural link between your action and your glass. If it shifts or flexes, your zero moves, and your data is no longer repeatable.
A weak mount costs more precision than it first appears, and the cause is easy to overlook. It shows up as unexplained fliers rather than a sudden loss of zero, so the mount is usually the last part anyone thinks to check.
The good news is that the market has converged on a handful of proven designs, from makers like Hawkins Precision, Area 419, and Spuhr who understand what ELR and competition shooters need. The harder part is choosing between them. Ring height, cant, sight-over-bore, and objective clearance all interact, and they interact differently with your specific chassis, barrel profile, and shooting style.
This guide walks through what to look for in a 1-piece scope mount. It starts with the basics of tube diameter and ring height, then moves to the details that quietly decide a build, like mirage off a hot barrel, ejection-port clearance, and the diving-board accessories.
Tube Diameter: The Non-Negotiable Starting Point
The first spec to confirm is your scope's tube diameter, because it decides which mounts are even compatible. Most precision scopes use a 30mm or 34mm main tube, while a smaller number of high-end optics run 35mm or 36mm. The rings have to match the tube exactly, since no adapter or shim makes a 30mm ring safe on a 34mm scope.
The 30mm tube is the older standard, and it is still common on mid-tier optics like the Vortex Viper PST Gen II and many Leupold Mark 5 models. The 34mm tube now dominates high-end glass such as the Vortex Razor HD Gen III, the Kahles K525i, and the Nightforce ATACR. The wider tube leaves the erector assembly more room to move before it contacts the tube wall, which is what allows more elevation travel1. If you are building for ELR or RLR and you want every mil of elevation you can get, the 34mm tube is the better long-term bet.
Once you know your tube diameter, every other choice flows from it, since ring height, cant, and accessory fit are all specific to the tube size. Confirm it first, before you start comparing mounts.
Ring Height: Balancing Clearance, Ergonomics, and Sight-Over-Bore
Ring height is the vertical distance from the top of your action rail to the center of the scope tube, and it is the single most consequential dimension on the mount. Too low, and your objective bell hits the barrel or your bolt handle contacts the turret housing. Too high, and your cheek weld suffers while your sight-over-bore grows. That larger sight-over-bore exaggerates parallax and zero offset at close range.
Most makers offer three or four height options per tube diameter, usually labeled Low, Medium, High, and sometimes Extra High. The actual numbers vary by brand, but for 34mm mounts the ranges tend to look like this:
- Low: 1.0–1.1 inches (25–28mm)
- Medium: 1.2–1.35 inches (30–34mm)
- High: 1.4–1.5 inches (35–38mm)
- Extra High: 1.6+ inches (40mm+)
For 30mm mounts, subtract roughly 2mm from each category, because the smaller tube sits lower in the same ring.
The right height depends on four things: objective diameter, barrel contour, chassis or stock design, and your preferred cheek weld. Here is how each one pushes the decision.
Objective Lens Clearance
The objective bell is the widest part of most scopes. It needs to clear the barrel with enough margin that you never risk contact under recoil or when a hot barrel expands. For a heavy bull barrel near 0.9 to 1.0 inch at the muzzle, a 56mm objective usually needs a Medium or High mount, while a lighter sporter barrel will often clear a large objective in a Low mount.
The check itself is simple. Mount the scope finger-tight with no torque yet, slide it as far forward as you want it, and confirm at least 0.1 inch (2.5mm) of clearance between the bell and the barrel at the closest point. If you run a sunshade or a flip-up cover, add it before you measure, because it extends the front profile.
It is easy to assume a 50mm objective needs less clearance than a 56mm. The objective number is measured at the front glass, but the bell housing can be wider than the lens itself, so always measure the real bell diameter with calipers rather than trusting the spec sheet.
Barrel Proximity and Mirage
Mechanical clearance is not the whole story, because a scope mounted too close to a hot barrel reads mirage that distorts your sight picture during a fast series of shots. This is more pronounced on competition chassis that leave the barrel exposed, like an MPA BA Comp or a Foundation Genesis, than on a tactical chassis that shrouds the barrel in an M-LOK forend.
If you shoot F-Class or PRS, you might fire ten to fifteen rounds in a stage without letting the barrel cool, and Medium or High rings help there by lifting the objective farther from the heat. The mirage is worst at high magnification on a still, hot day, when the thermal waves rise straight up and cross your line of sight. A Low mount sets the objective about 1 inch above the bore while a High mount gives closer to 1.5 inches. That extra half-inch gives you more time before mirage sets in.
Cheek Weld and Ergonomics
The other half of the height question is how the scope sits against your face. Most precision chassis and stocks are built around a Medium mount, which puts the scope at a natural height for prone shooting with a slight head tilt. Go taller than Medium and you will likely need a cheek riser, or you will have to adjust the comb to hold consistent eye alignment behind the optic.
Some chassis make this easy, because the MPA BA Competition and the KRG Bravo have tool-free adjustable risers that dial in for any mount. Others do not, since the Manners T4A and McMillan A5 use fixed combs built around a Medium mount, so a High mount means either a poor weld or a trip to a gunsmith for a comb raise.
A proper cheek weld matters more than it might seem, because inconsistent head position feeds straight into inconsistent eye relief and parallax error. If you are craning your neck to see through the optic, your groups open up. Your wind calls suffer too, because you have added a positional variable that has nothing to do with the rifle or the load.
Sight-Over-Bore Height
Sight-over-bore is the vertical distance from the bore centerline to your line of sight. It drives both your zero offset and your close-range path. A Low mount might give 1.5 inches while a High mount might give 2.0, and that half-inch changes where the bullet first crosses the line of sight, so your near holds change along with it.
For ELR, where you zero at 100 or 200 yards and dial everything past that, sight-over-bore barely matters. It matters more for PRS or tactical work, where you might take a 50-yard shot or hold on a mover at unknown distance, because a lower sight-over-bore keeps your line of sight and bore closer to parallel and simplifies the hold.
The trade-off is that lower mounts limit your options for objective size, barrel contour, and accessories. For most builds it is better to optimize for clearance and ergonomics first and accept whatever sight-over-bore that produces, rather than chase a low number and compromise everything else.
Ejection Port Clearance
One dimension gets overlooked, which is whether the scope body or the turret housing blocks your ejection port. It mostly shows up with large-turret scopes in Low rings on a short action, like a Nightforce ATACR or a Kahles K525i. If the windage turret sits directly over the port, you cannot top-load a single round or clear a malfunction without pulling the bolt.
The fix is either a Medium ring or sliding the scope slightly forward, though sliding it forward costs eye relief and can create a clearance problem at the objective end. Check this before you torque anything down, because finding it afterward means loosening everything and starting over.
MOA Cant: Gaining Elevation Travel Without Buying a New Scope
Most precision mounts include a built-in cant, also called a taper or incline, that tilts the rear of the scope up relative to the bore. This mount cant is measured in MOA rather than the mil units on your turrets, and it pre-dials elevation into your zero so you have more upward travel left in the erector when you need it.
The common values are 0, 10, 20, 30, 40, and 60 MOA, though some makers add 15 and 50 MOA for niche use. The right cant depends on your cartridge's trajectory, your scope's total elevation range, and how far you want to reach.
How MOA Cant Translates to Mils of Elevation
Most precision shooters dial in mils, so it helps to convert. One MOA is roughly 0.29 mil, or about 3.5 MOA per mil2. That works out to:
- 10 MOA cant: ~2.9 mils
- 20 MOA cant: ~5.8 mils
- 30 MOA cant: ~8.7 mils
- 40 MOA cant: ~11.6 mils
- 60 MOA cant: ~17.4 mils
Those are the mils you gain at the top of your range, so you can dial farther before running out, but you lose the same amount at the bottom. A 40 MOA cant gives up roughly 11.6 mils of down travel, which is irrelevant for a rifle zeroed at 100 yards because you never dial below zero. If you zero at 300 yards, or you need a 25-yard shot, a tall cant can drop those near targets below your available travel.
Matching Cant to Your Cartridge and Distance Goals
The goal is to choose a cant that keeps your common distances in the middle third of your elevation range, which leaves headroom to reach farther without running dry on a normal shot.
Take a 6.5 Creedmoor with a 100-yard zero and 30 mils of total travel:
- A 0 MOA mount gives you 15 mils up and 15 down, and at 1,000 yards a typical 140-grain load needs about 10 mils, so you are fine. At 1,500 yards you are looking at 18 to 20 mils, which exceeds your travel.
- A 20 MOA mount shifts the window to roughly 21 mils up and 9 down, so that same 1,500-yard shot now sits inside your range, and you can push toward 1,800 or 2,000 yards before the ceiling.
For a 6mm Creedmoor with its flatter arc, 20 MOA often reaches past 1,500 yards, while a .308 Winchester with more drop might want 30 or 40 MOA to cover the same ground. For a .300 Winchester Magnum pushed past 2,000 yards, a 40 or 60 MOA cant keeps those extreme distances inside the scope's mechanical range.
How Much Further Each Cant Gets You
The practical question is how many yards each step of cant gives, and the answer depends on the load, but here are rough numbers for a 6.5 Creedmoor running a 140-grain ELD-M near 2,700 fps:
- 0 to 10 MOA: adds ~200–250 yards
- 10 to 20 MOA: adds another ~200–250 yards
- 20 to 40 MOA: adds ~400–500 yards
- 40 to 60 MOA: adds ~300–400 yards
These are not linear, because the trajectory steepens as you go out, so each added mil gives fewer yards the farther you get. A 60 MOA cant is more than most shooters need unless you are building a dedicated 2,500-yard rig, and even then a scope with more internal travel serves you better than extreme cant.
The Downside of Too Much Cant
Excess cant costs you more than down travel. First, it steepens the angle between bore and line of sight, which exaggerates parallax up close and makes your 100-yard zero sensitive to cheek weld and eye position. Second, the reticle can look tilted at long range, because the scope sits angled in the rings and the erector is using up its down travel to hold the zero at 100 yards.
For most builds, a 20 or 30 MOA cant paired with a scope that has plenty of travel works better than a 40 or 60 MOA cant holding a 100-yard zero at the edge of its range. The usual choice is 20 MOA for short and mid actions, and 30 MOA for magnums or ELR-specific rigs.
Build Quality and Materials: Where the Premium Mounts Are Worth It
The functional ask of a mount is simple, since it only has to hold the scope rigidly, survive recoil, and keep zero. The difference between a $150 mount and a $400 mount is in the machining tolerances, the materials, and the finish work that hold up over thousands of rounds.
Materials and Machining
Most precision mounts are CNC-machined from 7075-T6 aluminum, which has an excellent strength-to-weight ratio and machines to tight tolerances. Some makers like Spuhr use steel for the ring caps or clamping hardware, which adds rigidity for heavy-recoiling cartridges like .300 Norma Mag or .338 Lapua.
Machining quality shows up in three places: the flatness of the base where it meets your rail, the roundness of the rings and how well they align, and the finish on the threads and clamping surfaces. Rings that are not perfectly concentric pinch the scope tube unevenly when you torque the caps, and that stress can make the erector bind or the zero shift as the scope heats and cools.
Premium mounts hold their rings to very tight concentricity, so the tube sits evenly and the clamping force spreads out. A cheaper mount with looser rings can pinch the tube enough to cause trouble over time, which is exactly the problem the better machining solves.
Recoil Resistance
Recoil is a rearward force that tries to slide the scope back in the rings, and the mount resists it with clamping force from the caps and friction at the contact surface. Some mounts add a recoil lug or pin that locks the scope mechanically, but most rely on properly torqued caps and a textured clamping surface.
The key is a torque driver and the maker's exact spec, because under-torque lets the scope slip while over-torque can crush the tube or strip the threads. Vortex, for example, recommends 15 to 18 inch-pounds on its riflescope ring caps3. The base or cross-bolt screws that clamp the mount to the rail usually run higher, often 45 to 65 inch-pounds depending on screw size, so always check the figure for your specific hardware.
A common first mistake is skipping the torque driver and setting the screws by feel. Hand-tight usually lands around 5 to 8 inch-pounds, well under spec, so the scope can slip, and leaning into it can exceed 25 inch-pounds the other way. A torque driver costs about $30 and removes the guesswork.
Premium Choices: Hawkins, Area 419, and Spuhr
Hawkins Precision, Area 419, and Spuhr are three of the most popular premium brands among ELR and PRS shooters. All three machine to tight tolerances and offer a range of heights and cants, but each one is built around a different idea, and that is the useful way to choose between them.
Hawkins builds the Heavy Tactical 1-piece mount around rigidity and a level. It uses a triple cross-bolt clamp and six screw caps per mount, with a built-in anti-cant bubble level and a removable Picatinny accessory rail4. The front cap can even flip so the level sits on the opposite side for left-handed shooters, and it comes in 0, 20, and 40 MOA. If you want the level baked into the mount instead of clamped on later, this is the one.
Area 419 leans on machining precision. Its Tactical mount uses serialized, final-bore-matched rings that are bored as a set, with raw aluminum internals left un-anodized so they grip the tube more reliably5. Area 419 also built the ARCALOCK ecosystem, so the mount fits a wider family of ARCA rails, bipods, and accessories. If you are already in the ARCA world, that integration is a real draw.
Spuhr makes the ISMS from a single piece of 7075-T651 billet, so there are no ring joints to lap or work loose, and it carries an integrated bubble level at the rear6. The 45-degree split rings keep the turrets visible, and each ring uses six Torx screws. For an ELR build where you want one rigid, level, do-everything platform, Spuhr is hard to beat.
Many of these mounts also offer an enhanced ring with a small recoil lug that mates to a groove in the scope tube, which helps on smooth, non-knurled tubes where friction alone might not hold. On a .300 Win Mag or larger the lug is worth having, and on a 6.5 Creedmoor it does no harm.
Installation: Torque Specs and Alignment
Installing a mount well is a five-step job: clean the mating surfaces, apply thread locker, torque the base screws, align the scope, and torque the ring caps. Skip a step or do them out of order, and that is how a scope shifts zero or develops a mechanical problem.
Step 1: Clean the Mating Surfaces
The base of the mount and the top of your rail have to be clean and free of oil, dirt, and old thread locker. Wipe both with isopropyl alcohol and a lint-free cloth, then let them air-dry for a few minutes, because any film between the mount and the rail cuts the friction that resists recoil.
Step 2: Apply Thread Locker
Most makers call for blue, medium-strength thread locker on the base screws that hold the mount to the rail. LOCTITE 243, the common blue grade, is medium strength and reaches full cure in about 24 hours, so give it that time before you shoot7. Put a small drop on the threads of each screw rather than in the hole, because a flooded hole can hydraulic-lock and stop the screw from seating.
Skip red, high-strength thread locker unless the maker specifically calls for it, because red needs heat to break loose and you can damage the finish on your action when you remove it. As one more wrinkle, some ring makers including Vortex tell you to leave thread locker off the ring cap screws entirely, since it can act as a lubricant and lead you to over-torque, so follow the instructions that come with your specific rings.
Step 3: Torque the Base Screws
Start the base screws by hand to be sure they thread in clean, then bring them to the maker's spec with a torque driver, often 45 to 65 inch-pounds depending on screw size. Tighten in a cross pattern, front-left, rear-right, front-right, rear-left, to spread the force and keep the mount from canting as it seats.
If you run a Picatinny rail, make sure the mount's recoil lug, the small tab under the base, drops into one of the cross slots. The MIL-STD-1913 rail spaces those slots 0.394 inches apart with square bottoms, and that square slot is what stops the mount sliding rearward under recoil8, so seat the lug fully.
Step 4: Align the Scope
Set the scope in the rings without the top caps, then slide it fore and aft until the eye relief feels right, usually 3.5 to 4 inches from your eye to the rear lens in a natural position. Most shooters run the scope as far forward as clearance allows, because that gives the most eye relief and the most room to move your head without losing the picture.
With the fore-aft position set, rotate the scope until the reticle is level, and the easy way is a small bubble level on the tube or the turret. Level the rifle first, off a flat surface or a level on the rail, then turn the scope until the bubble reads true. Some shooters level the reticle to a plumb line hung downrange, which accounts for any tilt in the action, but for most work a simple bubble level is enough.
Step 5: Torque the Ring Caps
With the scope set and level, install the top caps and bring the screws to spec, often 15 to 18 inch-pounds. Tighten in an alternating cross-pattern, in small steps, rather than fully seating one screw before the next, which keeps the clamping force even across the tube9.
When the caps are torqued, check that the gap between cap and ring is even on both sides. If one side gaps wider, the scope is off-center, so loosen the caps, re-center it, and torque again.
Diving Boards and Accessory Rails: What to Mount and Why
Many precision mounts include a short Picatinny rail, often called a diving board, on top of the front ring or reaching forward from the base. It carries accessories like a red dot, a rangefinder, or an angle indicator, and it is one of the features that separates a competition mount from a basic hunting one.
Red Dots for Close-Range Transitions
A red dot on the diving board gives you a fast close-range option without leaving the scope, and it shines in PRS or tactical stages where you might take a 50-yard target and then swing to 600 yards in the same string. You zero the dot at 25 or 50 yards, then tilt the rifle slightly to bring it into view while your primary eye stays behind the scope.
A red dot adds only 3 to 6 ounces, which is nothing on a precision rig, so the thing to watch is placement rather than weight. It sits above your line of sight and can crowd your cheek weld if it is mounted too far back, so most shooters push it as far forward on the board as it will go.
Popular choices for precision rifles include the Trijicon RMR Type 2, which weighs 1.2 ounces with its battery and runs about two years on a single CR203210, along with the Leupold DeltaPoint Pro and the Aimpoint Micro T-2. All three are built for handgun or carbine use, so they are compact, light, and hold zero under recoil.
A Rifle-Mounted Rangefinder
You can also mount a laser rangefinder to the diving board, and the reason is precision, not convenience. Mounting it on the rifle lets you aim the laser through the scope's magnification, so the beam lands on the actual target instead of a rock or a bush 300 yards in front of it11. A handheld unit aimed by eye at long range is easy to put on the wrong object, and the magnified optic fixes that.
It helps to keep two tools straight here. A rangefinder measures the distance to the target. A ballistic solver, like a Kestrel 5700 or a Garmin running Applied Ballistics, takes that distance plus the conditions and computes the firing solution. They are different jobs, though some rifle-mounted units now combine the laser and the solver in one housing.
Mounting the unit forward and low on the board keeps it out of your line of sight and your cheek weld. For ELR and F-Class, where the rifle is heavy and stable and you range from a fixed position, a rifle-mounted rangefinder is right at home.
Angle Indicators and Bubble Levels
Some mounts build in a bubble level, on the diving board or the side of the rings, to confirm the rifle is upright before a shot. The level reads the rifle's left-and-right tilt, its roll about the bore, not any up-and-down angle. Keeping that roll at zero is what makes your dialed elevation go straight up.
This is where it proves its worth at distance. If the rifle is rolled even a degree or two and you dial a lot of elevation, that elevation no longer goes purely vertical, so it adds unintended windage, and the error grows with how much you dial. At 1,500 yards and beyond, a small roll you would never notice up close can push you off by inches. A level catches it.
The level helps most from unconventional positions like barricades, tripods, or steep angles, where your own sense of upright is unreliable. For prone on flat ground, most shooters build a consistent, level position through practice and rarely need the reference.
FAQ
How do I know what ring height I need for my scope and barrel?
Mount the scope finger-tight, set it where you want it, and measure the gap between the objective bell and the barrel. You want at least 0.1 inch (2.5mm) of clearance, and more if you run a sunshade or flip-up cover, so if the gap is too tight, step up one height and check again.
Can I use a 20 MOA scope mount on a rifle I only shoot to 600 yards?
You can, and there is no harm in it, though the extra cant does more than you need at that distance. A 20 MOA cant adds roughly 5.8 mils of up travel, which helps past 1,200 yards, so a 0 or 10 MOA mount is plenty for mid-range and keeps more down travel for a longer zero or a close target.
What torque spec should I use if the manufacturer does not list one?
For base screws that hold the mount to the rail, 45 to 55 inch-pounds suits most 6-48 or 8-40 hardware, while ring caps that clamp the tube want about 15 to 18 inch-pounds on most aluminum mounts. If the maker publishes a number, use that instead, because thread engagement and materials change the right value.
Do I really need a torque driver, or can I tighten a scope mount by feel?
A torque driver is worth it. Hand-tight runs about 5 to 8 inch-pounds, well under spec for most mounts, and it is easy to over-torque and dent the tube when you go by feel, so the driver is one of the best small investments you can make for a scope install.
Citations
- 30mm vs 34mm: Which Optic and Mount Are For You?. Primary Arms.
- MOA vs Mil. RECOIL.
- How to Torque Your Riflescope Rings. Vortex Optics.
- Heavy Tactical 1-Piece Mount. Hawkins Precision.
- Area 419 Tactical One-Piece Scope Mount. Area 419.
- Review: Spuhr ISMS. RECOIL.
- (2020). LOCTITE 243 Technical Data Sheet. Henkel.
- (1995). MIL-STD-1913 Dimensioning of Accessory Mounting Rail. U.S. Department of Defense.
- How to Properly Mount a Riflescope. Vortex Optics.
- Trijicon RMR Type 2 Red Dot Sight. Trijicon.
- Rifle Scope Mounted Rangefinder. LaserWorks.